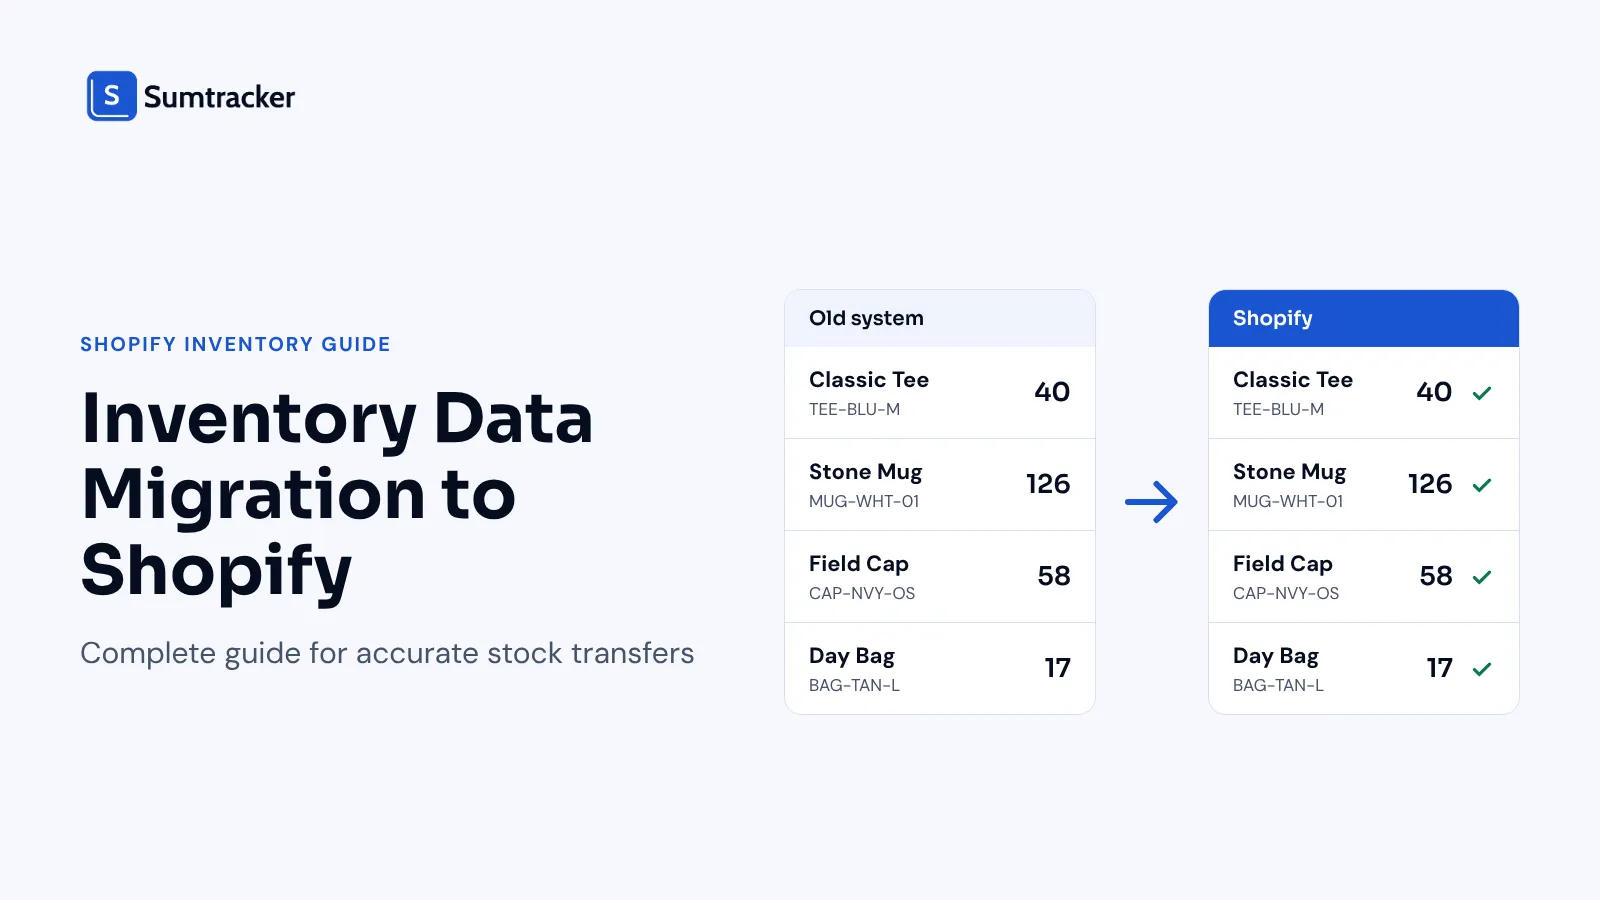
Inventory Data Migration to Shopify: Complete Guide for Accurate Stock Transfers


Migrating inventory to Shopify requires two CSV files: a product CSV for your catalog and an inventory CSV for stock quantities at each location. Clean your data before you move it, load it in the right order, and verify every number before you sell.
- Two files, not one: The product CSV creates your catalog. The inventory CSV sets quantities per location. Multi-location stores need both.
- Clean first: Fix duplicate SKUs, remove dead products, count physical stock. About 65% of SKUs have inaccurate system records (ECR Retail Loss, 2025).
- Import order matters: Locations first, products second, quantities last. Quantities go stale fastest.
- Verify before selling: Compare record counts, unit totals, tracking status, spot-check shelves, and run a test order.
- Stay accurate after migration: Sumtracker syncs inventory across Shopify, Amazon, Etsy, eBay, and Walmart from one dashboard.
A free migration template and CSV pre-flight checker are included below to help you plan and validate each step.
Moving your inventory to Shopify sounds simple. Export a file, import a file, done.
Then the first order comes in for a product that shows 40 units online and has 4 on the shelf.
Most migration problems don't start in Shopify. They start in the data you bring with you. Duplicate SKUs, old counts, and location names that don't match all carry over if you let them.
This guide covers the full process. You'll see what data to move, how to clean it, which import method fits your store, and how to check that every number landed correctly.
What Inventory Data You Need to Migrate to Shopify
Inventory migration means moving your product records and stock quantities from your current system into Shopify. Your current system could be another ecommerce platform, a POS, an ERP, or a spreadsheet.
Not everything in your old system has a place in Shopify's import files. So the first job is to sort your data into three groups: what moves, what you set up by hand, and what stays behind.
Two points in this table catch people out.
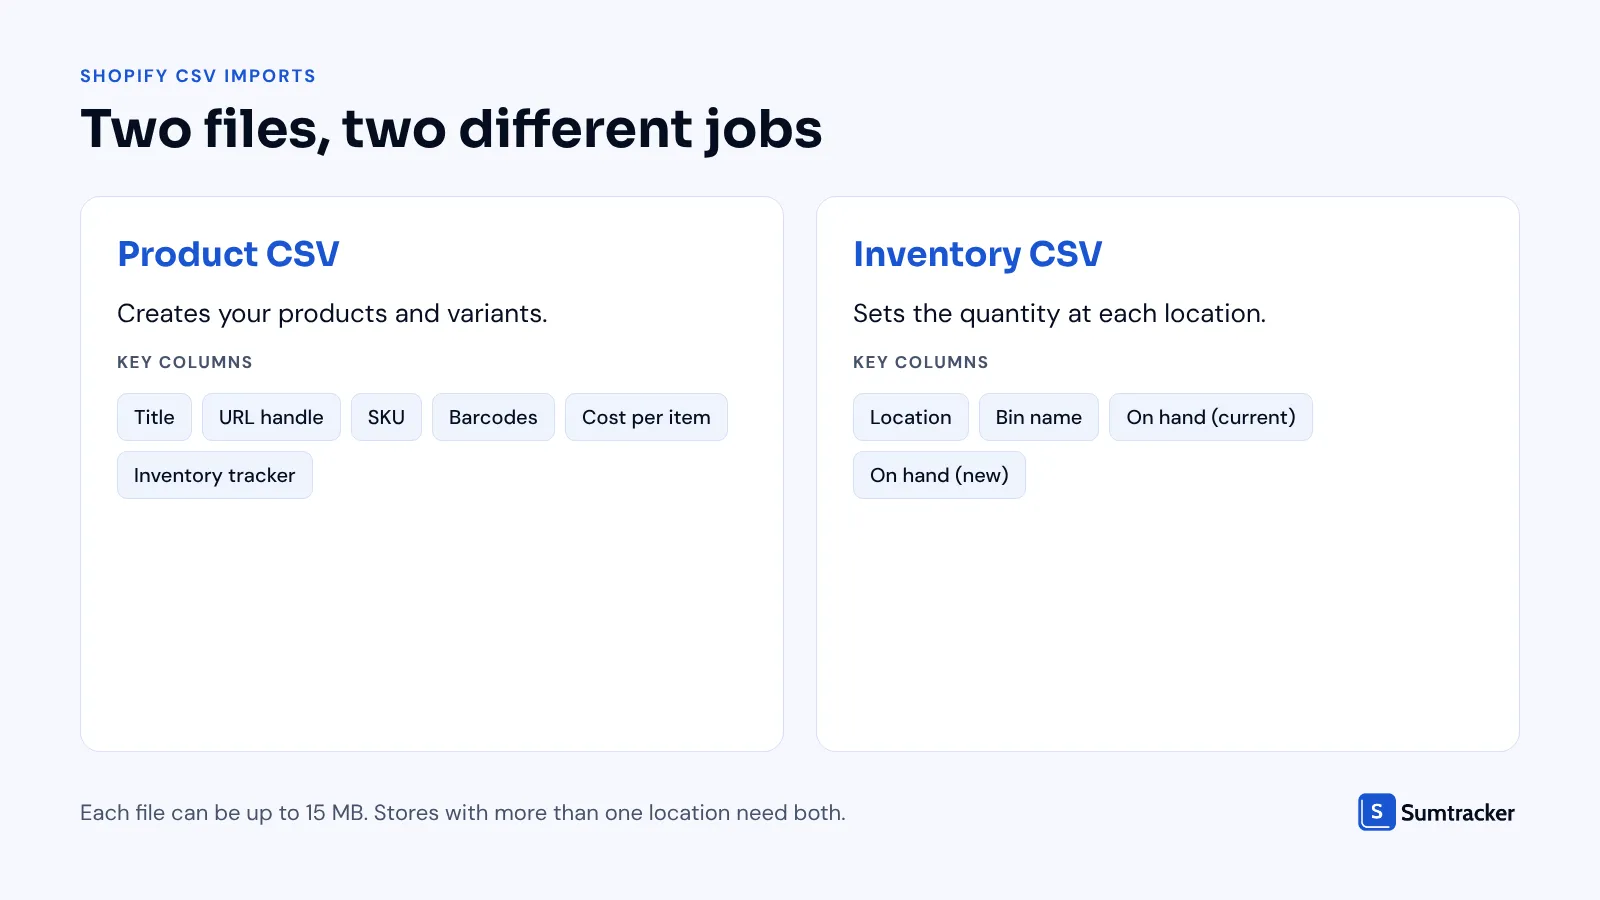
First, products and quantities travel in different files. Shopify's product CSV creates the catalog. Its inventory CSV sets how many units sit at each location. If you run more than one location, you need both.
Second, your history does not come with you. Shopify builds an adjustment history for each variant from the moment stock is imported. It then shows the last 180 days of changes. Nothing from your old system appears there.
Rule of thumb: migrate your current state and archive your history. Export old stock movements, purchase orders, and count sheets as files. Store them somewhere safe. You will want them at tax time or when a number looks wrong.
If Shopify's quantity types are new to you, read our guide to Shopify inventory levels first. It explains what each number on the Inventory page means.
How to Prepare and Clean Your Inventory Data Before Migration
Clean your data before it enters Shopify, not after. Fixing a duplicate SKU in a spreadsheet takes seconds. Fixing it after orders have started flowing takes much longer.
Work through these five steps in order.
1. Export everything and keep an untouched copy
Pull a full export from your current system. Include products, variants, SKUs, barcodes, costs, and stock by location.
Save one copy and never edit it. This is your source of truth when you check the results later.
2. Decide what should not move
A migration is a good time to drop dead weight. Remove test products, duplicates, and items you no longer sell.
For products you have retired but still hold stock for, see our guide to handling discontinued products on Shopify.
3. Fix your SKUs
Every variant needs one unique SKU. No blanks. No two variants sharing a code. No stray spaces before or after the text.
This matters beyond Shopify. Most inventory and shipping apps match products by SKU. Two listings with the same SKU can be treated as one product. Our guide on preventing duplicate inventory listings covers this in detail.
Practical tip: format your SKU and barcode columns as text before you paste data in. Spreadsheet apps often strip leading zeros from numbers. A barcode of 012345678905 becomes 12345678905, and your scanner stops recognising it.
4. Reshape variants to fit Shopify
Shopify allows three options per product, such as Size, Color, and Material. If your old system used four or five attributes, decide now how to combine them or split the product.
5. Count your physical stock
This is the step most stores skip. It is also the one that decides whether your migration is accurate.
Your old system's numbers are a record of what should be on the shelf. They are not proof of what is there. A 2025 study commissioned by ECR Retail Loss looked at 11 UK grocery stores and more than 24,000 SKUs. About 65% of SKUs had a system record that did not match the shelf.
That study covered physical grocery stores, not ecommerce warehouses. The takeaway still applies. System counts drift over time, and an import will copy that drift into your new store.
You don't have to count everything. If a full count isn't possible, count your best sellers and highest-value items at minimum. Our inventory audit checklist and cycle counting guide show how to run both.
Common data problems and how to fix them
The free Inventory Migration Template has a pre-migration checklist and a data cleanup log, so you can track each fix as you make it.
It also helps to hear how another store handled this stage. In episode 109 of the Shopify with Milk Bottle Show, the owner of Irish retailer Babyboo.ie talks through her move from WordPress to Shopify. The episode covers auditing and cleaning product data before the import.
What Inventory Data You Need to Migrate (SKUs, Variants, Locations, Stock Levels)
Four fields decide whether your stock transfer is accurate: SKUs, variants, locations, and stock levels. Each one has a rule in Shopify that you need to know before you build your files.
SKUs
The SKU is how you, your team, and your apps identify a variant. In the product CSV it goes in the SKU column.
One thing to know: Shopify itself does not force SKUs to be unique. It will accept two variants with the same code. That makes it your job to check for repeats before import.
Also note that the inventory CSV cannot change a SKU. Shopify's Help Center says that column is only there to help you identify rows. To edit SKUs in bulk, use the product CSV.
Variants
A variant is one sellable version of a product, such as a medium blue shirt. Shopify tracks stock per variant, not per product.
Since October 2025, a product can have up to 2,048 variants, up from the old limit of 100. The cap of three options per product has not changed.
Practical tip: a higher limit in Shopify does not mean your theme and apps support it. Matrixify's documentation on Shopify limits notes that some themes and apps still handle only 100 variants per product. Check yours before you import a product with more.
For a deeper look at how stock works at this level, see our Shopify variant inventory guide.
Locations
A location is any place where you hold stock. That includes warehouses, retail stores, and pop-ups.
Locations must exist in Shopify before you import quantities. The inventory CSV matches each row to a location by name. The name must match exactly, and it is case-sensitive. "Main Warehouse" and "Main warehouse" are treated as two different things.
If a variant is never kept at a location, enter Not stocked for that row instead of 0. Zero means "we stock it here and have none". Not stocked means "this item doesn't belong here".
Our guide to Shopify inventory locations walks through the setup.
Stock levels
Shopify does not hold a single stock number. It holds several inventory states, and they relate like this:
On hand = Available + Committed + Unavailable
- On hand is everything physically at the location.
- Available is what you can sell right now.
- Committed is stock tied to orders that are placed but not fulfilled.
- Unavailable is stock set aside, such as damaged items or safety stock.
- Incoming is stock on its way. It is not part of On hand.
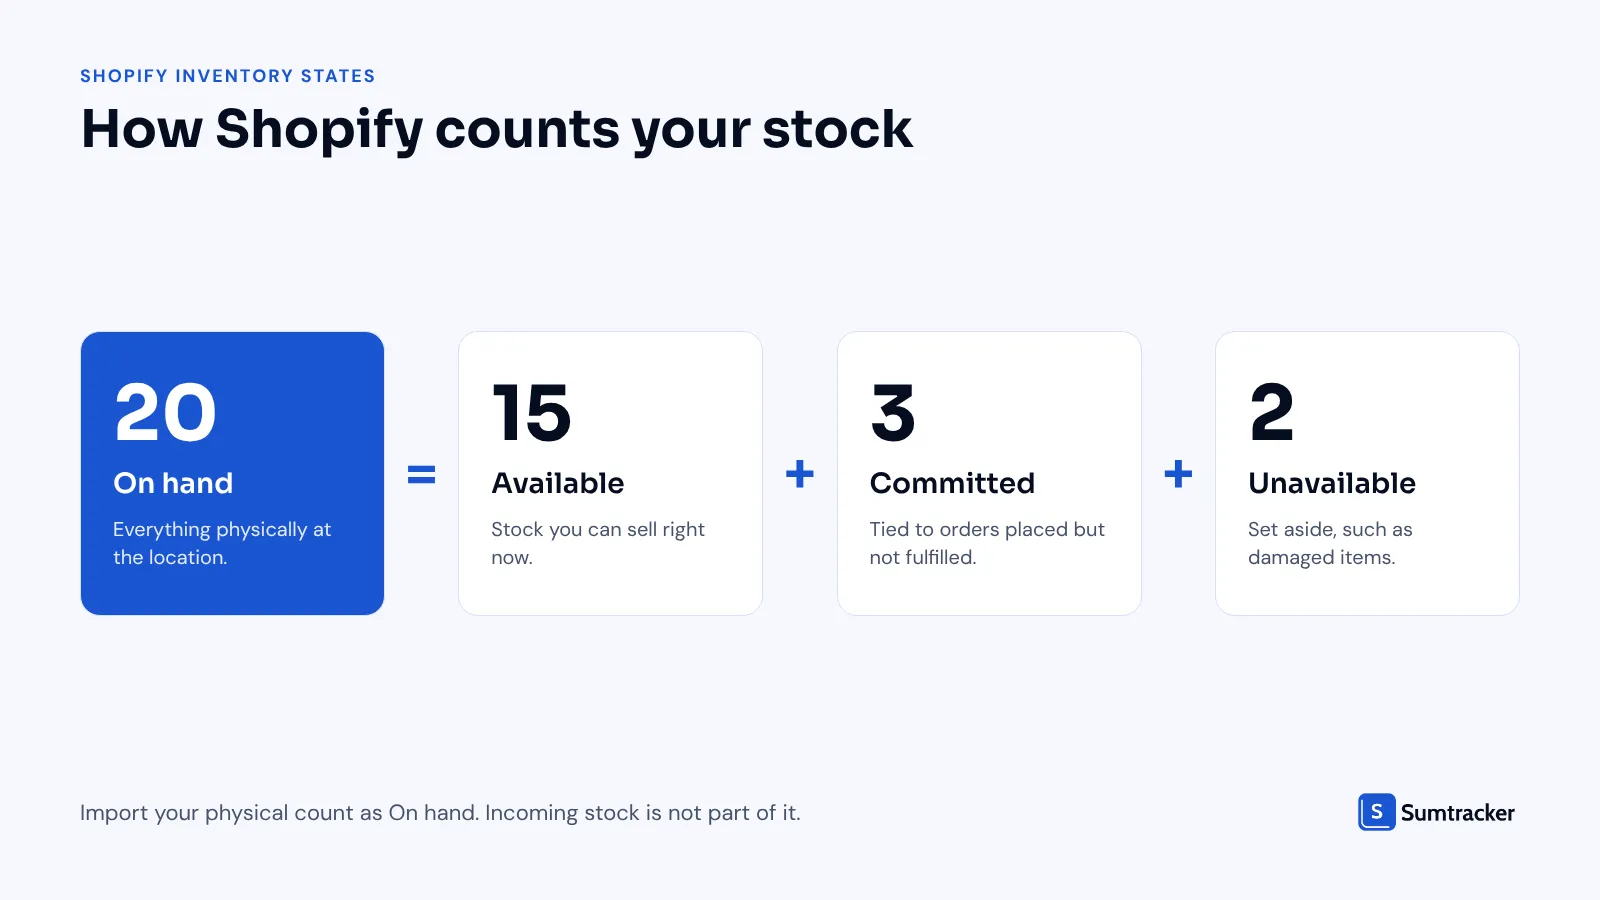
Here is an example. You count 20 jars on the shelf. Three belong to unfulfilled orders, and two are damaged. On hand is 20, Committed is 3, Unavailable is 2, and Available is 15.
Rule of thumb: import the number you physically counted as On hand. Let Shopify work out the rest. If your old system still has open orders at cutover, ship them from the old system first, then count.
Shopify limits to check before you import
Sources: Shopify Help Center pages on locations, product CSV files, and product imports. The daily variant limit is as documented by Matrixify, which notes it is subject to change.
Deactivated locations and app-managed locations, such as a 3PL app, don't count toward your location limit.
Methods to Migrate Inventory Data to Shopify
There are five ways to get inventory data into Shopify. The right one depends on how many SKUs you have, how many locations you run, and where your data lives today.
Manual entry
You type each product and quantity into the Shopify admin. This is fine for a few dozen SKUs. Beyond that, it is slow and typing errors creep in.
Shopify CSV files
This is the method most stores use, and the one this guide follows step by step. You fill in two spreadsheets and upload them. It costs nothing and works on every plan.
The trade-off is that the files are strict. Column headers must match Shopify's format exactly, and each file is capped at 15 MB.
Shopify's Store Migration app
Shopify's free Store Migration app imports product and customer data. It supports Square, WooCommerce, Etsy, Wix, Amazon, eBay, Clover, and Lightspeed R/X (Vend).
It is quick, but it has a gap that matters for inventory. Shopify's own guide to the app states that it doesn't import inventory by location. You set that up in Shopify afterward. The same guide says products with many variants or complex SKU structures need cleanup after import.
So treat it as a way to load your catalog. Plan to set location quantities yourself with the inventory CSV.
Third-party import apps
Import apps from the Shopify App Store handle larger files and more data types than the native tools. Matrixify is a widely used example. It works with Excel, CSV, and Google Sheets files. Its free plan covers 10 products per file, and paid plans start at $20 per month for up to 5,000 products per file.
Check two things before you pick any app: whether it supports quantities per location, and what its per-file limits are.
Admin API or a Shopify Partner
Developers can write stock directly through Shopify's Admin API. The inventorySetQuantities mutation sets on-hand or available quantities at a location. This route suits stores where an ERP or warehouse system is the source of stock data.
It is also the usual route for very large catalogs. Shopify's enterprise blog describes how ULE Group, an industrial power-distribution retailer, moved to Shopify with more than 250,000 SKUs. It worked with a Shopify Platinum Partner, and its setup can now support up to one million SKUs.
The lesson Shopify draws from projects like this is to put accuracy ahead of speed. Its advice is to build checks into the plan from day one, including record counts, sampling, and a rehearsal import before the real one.
Rule of thumb: choose the simplest method that can set stock at every location you run. If a method can't do that, you will end up finishing the job with the inventory CSV anyway.
How to Migrate Inventory Data to Shopify: Step-by-Step
This walkthrough uses Shopify's built-in CSV files. The order matters: locations first, products second, quantities last.
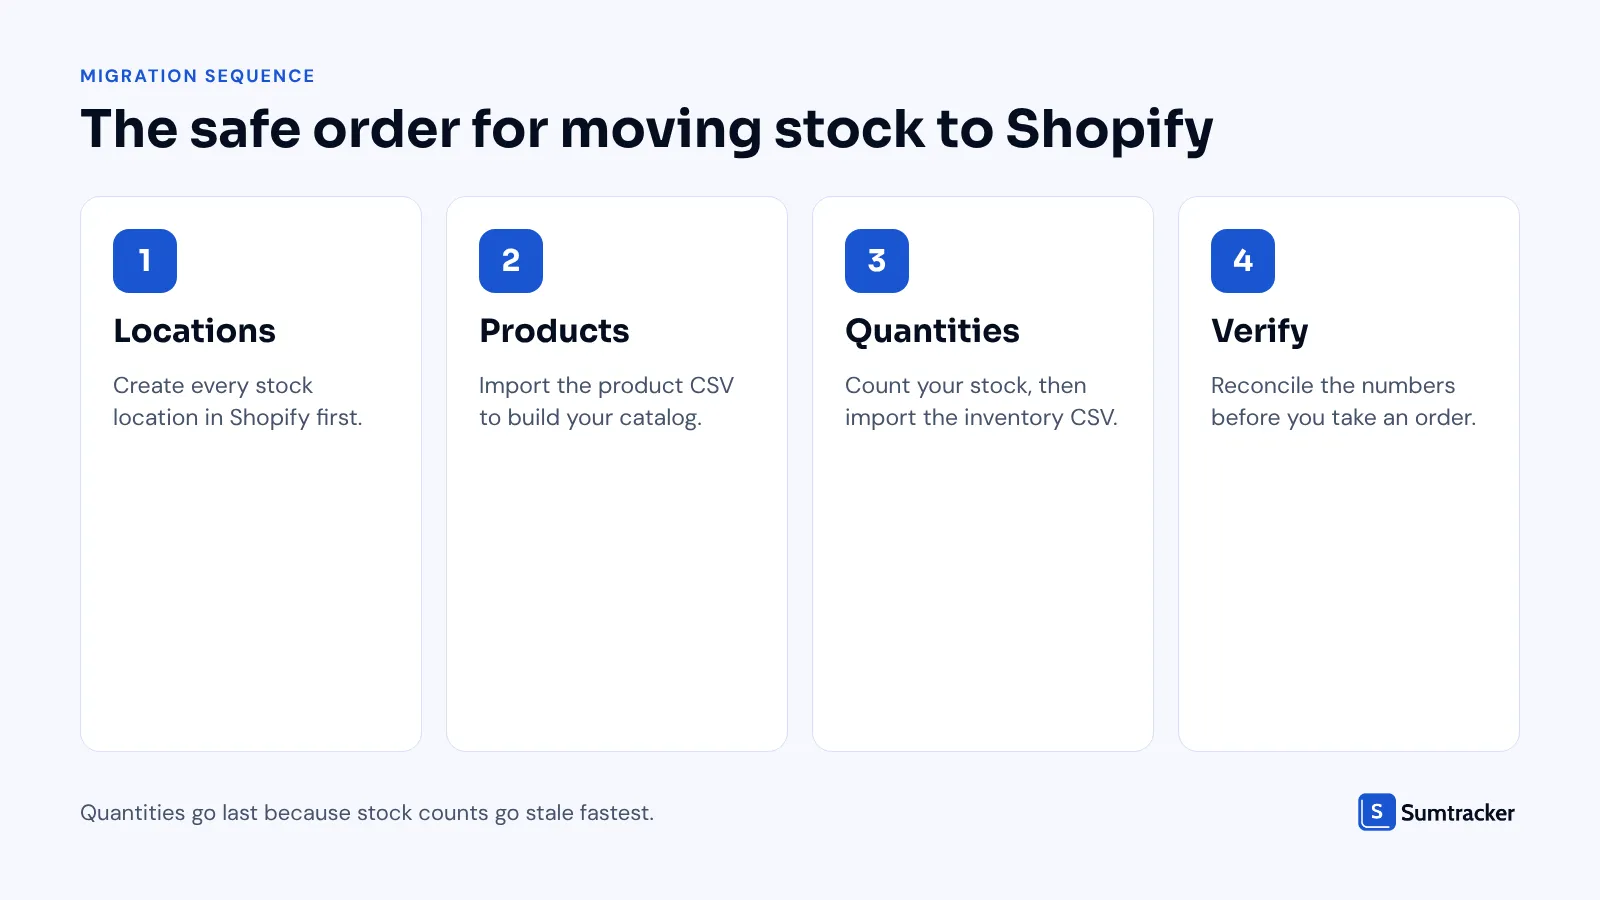
Quantities go last because they go stale fastest. Shopify says most businesses complete a migration in under three months. Stock numbers loaded in week one will be wrong long before launch.
Step 1: Create your locations
Go to Settings > Locations and add every place that holds stock. Write down each name exactly as you typed it. You will need those names later.
Step 2: Build your product CSV
In your Shopify admin, go to Products > Import and download the sample file. Use it as your template so the column headers are correct.
These are the columns that matter for inventory:
- Title is required for every new product.
- URL handle is required when a product has variants. It ties the variant rows together.
- SKU holds your unique code for each variant.
- Barcodes holds up to 20 barcodes per variant.
- Inventory tracker should be set to
shopifyso stock is tracked. If you leave it blank, the variant is not tracked. - Continue selling when out of stock accepts
denyorcontinue. - Cost per item holds your unit cost as a number, with no currency symbol.
If you have an older template, the column names may differ. Shopify still accepts older formats but recommends the current one.
Save the file as CSV with UTF-8 encoding. Google Sheets does this by default.
Step 3: Test with a small batch
Import five to ten products first. Pick a mix: a simple product, one with many variants, and one with a barcode.
Check how they look in Shopify. If something is off, fix your file now. Shopify notes that a product import cannot be cancelled once it starts, so a test run is your safety net.
Step 4: Import your full product file
- Go to Products > Import.
- Click Add file and choose your CSV.
- Review the options. "Publish new products to all sales channels" is selected by default. Untick it if you are not ready to sell on every channel.
- Review the details and click Import products.
Shopify emails you when the import is finished.
Practical tip: avoid sorting your product CSV in a spreadsheet. Shopify warns that sorting can break the link between products and their image rows, and those images are then lost on import.
If you prefer to watch the wider process first, Optimum7's 2026 Shopify Migration Guide on YouTube walks through moving products, customers, and orders to Shopify.
Step 5: Export the inventory CSV as your template
Go to Products > Inventory and click Export. Choose All states, which Shopify recommends. You get one row per variant per location, with your products already listed.
Here are the columns you will work with:
The Incoming, Unavailable, Committed, and Available columns are read-only. Our guide to the Shopify inventory CSV covers every column in detail.
Step 6: Enter your counted quantities
Type your counted number into On hand (new) for each row. Use whole numbers only.
For a variant that is never kept at a location, leave On hand (new) empty and keep On hand (current) as Not stocked. Leave a cell blank if you don't want to change that row.
Step 7: Import the inventory CSV
- Go to Products > Inventory and click Import.
- Click Add file, select your CSV, and click Upload file.
- Review the import summary.
- Click Start import.
If any rows fail, Shopify emails you the details. Fix those rows and import the file again.
Practical tip: freeze stock movements between your count and your import. No receiving, no transfers, no sales from the old system. Even a two-hour gap with open orders is enough to make your numbers wrong.
Step 8: Check the results before you sell
Don't open the store yet. The next sections cover what can go wrong and how to verify every number.
Common Inventory Migration Mistakes to Avoid
Most failed stock transfers trace back to a short list of errors. Each one is easy to prevent once you know it exists.
Three of these deserve a closer look.
Blank cells are not harmless
When you tick "Overwrite products with matching handles", Shopify treats your file as the new truth. A blank cell in a non-required column replaces the existing value with nothing.
A column that is missing from the file is different. Shopify leaves those existing values alone. So if you only want to update costs, delete the other columns instead of leaving them empty.
Changing options breaks variant IDs
Every variant in Shopify has an ID that apps rely on. If a re-import changes a value in an option column, Shopify deletes the old variant and creates a new one with a new ID.
Shopify's Help Center warns that this can break third-party tools that depend on those IDs. Any app that stores variant IDs can be affected. Get your option values right the first time.
The safety check exists for a reason
The All states inventory export includes two columns: On hand (current) and On hand (new). On import, Shopify compares the "current" value in your file with the live value in your store.
If they differ, stock changed after you exported. Shopify skips those rows and emails you. You can bypass this by clearing the On hand (current) column, but Shopify cautions that doing so removes the overwrite protection.
Rule of thumb: if rows fail the safety check, export a fresh file. Don't force the old one through.
For errors that show up in day-to-day stock handling after the move, see our list of common Shopify inventory mistakes.
How to Verify Stock Accuracy After Migration
An import that finishes without errors is not the same as an accurate import. Shopify confirms that rows were accepted. It can't confirm that the numbers are right.
Verification means comparing Shopify against your source file and your shelves. Run these five checks before you take a single order.
Check 1: Record count
Export your inventory from Shopify again. Our guide on how to export inventory from Shopify shows the steps.
Count the variant rows and compare them with your source file. A gap usually means rows failed, or duplicates were created.
Check 2: Unit totals
Add up On hand for each location in both files. If your source says 4,280 units at the main warehouse, Shopify should say 4,280.
Matching totals don't prove every row is right, because two errors can cancel out. They do catch missing locations and failed batches quickly.
Check 3: Tracking status
A variant with tracking switched off shows as always in stock. That leads straight to overselling. If you find untracked variants, our guide to inventory not tracked in Shopify explains the fix.
Check 4: Physical spot check
Pick a sample of SKUs and count them on the shelf. Include your best sellers, your highest-value items, and a random handful from each location.
Then work out your accuracy:
Inventory record accuracy (%) = SKUs where Shopify matches the shelf ÷ SKUs checked × 100
Say you check 200 SKUs and 194 match. That is 194 ÷ 200 × 100 = 97%.
For each mismatch, also note the size of the gap:
Variance = Shopify On hand − physical count
A positive variance means Shopify thinks you have more than you do. That is the dangerous kind, because it lets you sell stock that isn't there.
A careful check pays for itself. In the ECR Retail Loss study mentioned earlier, one store received a full stock audit and a matched store did not. The audited store's sales rose 11% over the next two months. The gains came from items where the system had been showing more stock than the shelf held.
Practical tip: don't stop at fixing the mismatched SKUs. Ask why each one was wrong. A pattern, such as every error sitting in one location, points to a mapping problem and not a counting problem.
Check 5: Test order
Place a test order for a tracked product. Available should drop and Committed should rise by the same amount. Fulfil the order, and On hand should drop.
You can see each change in the variant's adjustment history. Our guide on viewing inventory history for a variant shows where to find it.
If the numbers still don't line up after these checks, work through our guide on how to fix inventory mismatches.
The free Inventory Migration Template includes a reconciliation sheet that calculates variance and accuracy for you.
How Sumtracker Keeps Your Shopify Inventory Accurate After Migration
Getting accurate numbers into Shopify is half the job. Keeping them accurate is the other half.
Once you are live, stock changes constantly. Orders, returns, purchase deliveries, bundles, and sales on other channels all move the numbers. This is where an inventory system helps.
To be clear about scope: Sumtracker is not a migration tool. It doesn't move data from your old platform into Shopify. It takes over once your products and stock are in Shopify.
Here is what it does from that point.
It reads your Shopify data without a rebuild
When you connect your store, Sumtracker imports your products, SKUs, inventory levels, locations, tags, vendors, and prices automatically. You don't re-enter your catalog.
Setup includes the checks that migrations often miss
Before sync is switched on, Sumtracker's guided setup asks you to:
- Choose the sync direction for each location, so one system is the source of truth.
- Copy your current stock counts from the store.
- Review duplicate SKUs.
- Confirm that each Shopify location maps to the right warehouse.
Those last two are the same problems this guide warned about. Catching them a second time is useful.
All your channels sit in one place
Sumtracker keeps inventory in sync in a single dashboard. It connects Shopify, Shopify POS, Amazon, Etsy, eBay, and Walmart. If you sell the same stock in more than one place, see our guide to Shopify multi-channel inventory sync.
Counting stays simple
You can run full or partial stocktakes on a phone, tablet, or barcode scanner. You can also correct stock in bulk with a CSV, using either SKU or barcode with a quantity. Each file can hold up to 5,000 products.
Bundles are calculated for you
Shopify's CSV files don't carry bundle recipes. In Sumtracker, a bundle's stock is worked out from its components and updated when they change. Our Shopify bundle inventory guide explains how this works.
Frequently Asked Questions
Can I import inventory quantities with the Shopify product CSV?
Only if your store has one location. The product CSV's Inventory quantity column is for single-location stores. If you have multiple locations, use the inventory CSV to set quantities.
What is the file size limit for Shopify inventory imports?
Both the product CSV and the inventory CSV can be up to 15 MB. If your file is larger, split it into smaller files and import each one.
Does Shopify's Store Migration app move inventory?
It imports products and customers, including inventory levels. It does not import inventory by location. You set location quantities in Shopify after the import.
Will my stock history transfer to Shopify?
No. Shopify's adjustment history starts when stock is first imported, and it shows the last 180 days for each product or variant. Export your old history and keep it as a file.
What do I enter for a product that isn't kept at a location?
Enter Not stocked in the inventory CSV. Entering 0 tells Shopify the item is stocked there with no units left.
Do I need to count my stock before migrating?
It is strongly recommended. An import copies whatever numbers you give it. If your old counts are wrong, your new Shopify counts will be wrong in the same places.
When should I import quantities during a migration?
Last. Set up locations, import products, and test everything first. Then count your stock and import quantities as close to launch as you can.
Conclusion
An accurate inventory migration comes down to three habits. Clean your data before it moves. Load it in the right order. Check it before you sell.
Shopify's CSV files handle the transfer itself for most stores. The work that protects you happens on either side of the import: the count beforehand and the reconciliation afterward.
Download the free Inventory Migration Template to plan each step. And once you are live, a system like Sumtracker can keep those numbers accurate as orders start to flow.

Bhoomi writes about inventory management and multichannel selling at Sumtracker. Her focus is on solving real operational problems for Shopify, Amazon, and marketplace sellers through well-researched content. She covers everything from multi-location inventory syncing and stock error troubleshooting to replenishment planning and platform comparisons, turning complex eCommerce operations into clear, actionable guidance.
LinkedInRelated Articles
Tool and strategies modern teams need to help their companies grow.


Ready to Simplify Your Inventory Management?
Join hundreds of e-commerce merchants who rely on Sumtracker to save time, eliminate errors, and grow their business.